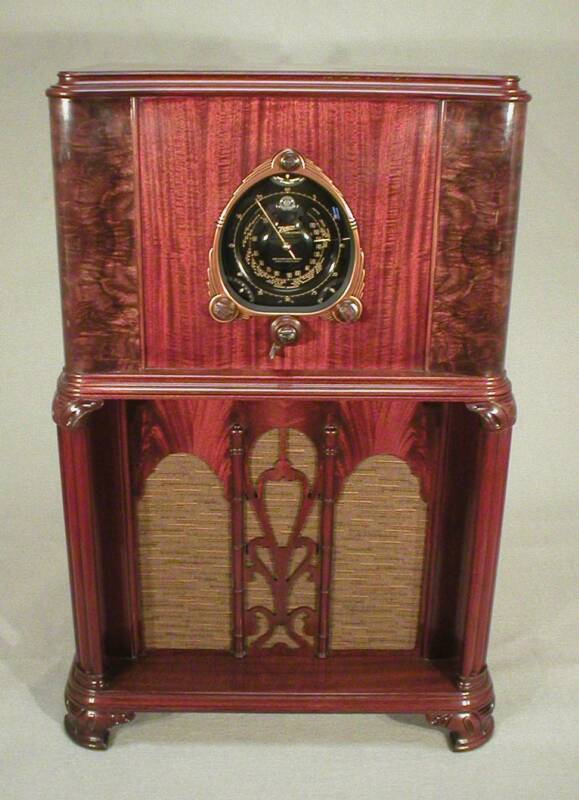
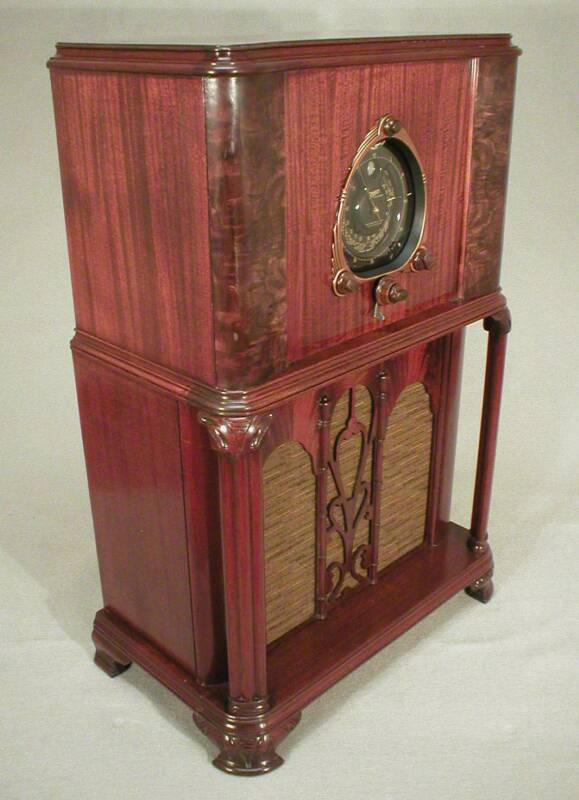
Fellow Indiana Historical Radio Society member Dr. Mike Clark and I have been buying and trading antique radios for some time now. Dr. Clark started several years before I became actively involved in the hobby, so he has helped me acquire some pieces that I may never have had the joy of owning. Dr. Clark has a really keen knowledge of the “sport” and has a very nice perspective on the preservation of this part of our cultural history. We struck upon a deal in late 2002 for me to repair and refinish the cabinet of one of his big Zenith consoles, the 15-U-271 model from 1938. The big set had fallen pray to the ravages of an unconditioned garage for a few years and was in need of a refinish.
When I first picked up the set at his place, I discovered that the chassis was in really nasty cosmetic condition but appeared to have been recapped fairly recently. This all caught me a bit by surprise, as I had only thought I would be doing cabinet restoration. I brought all the pieces back to my home and looked at it for a few days before deciding what to do with this project. Would I only restore the cabinet and return it with the nasty looking chassis inside? Would I restore everything although we had only discussed the cabinet? Once I looked it over, I decided to see what type of work had been done to the chassis and if it would work.
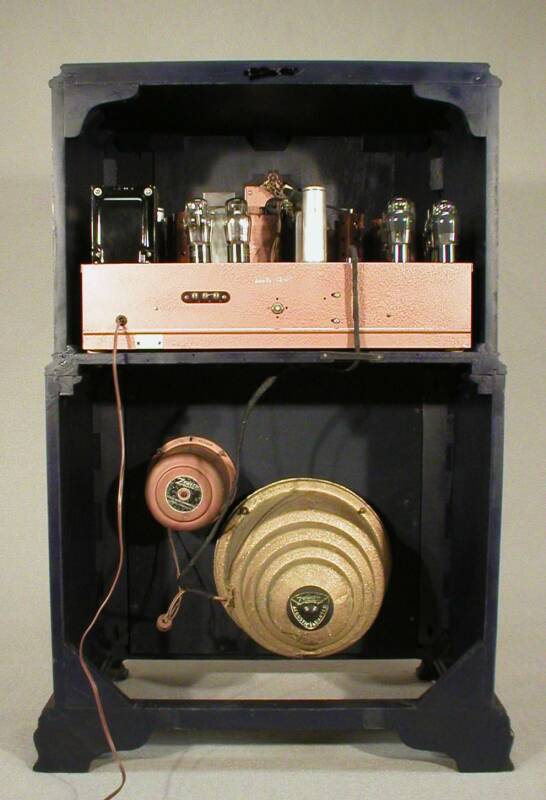
I put the huge chassis on my workbench and brought up the voltage slowly to see how it would respond. Once I got up to about 80 volts, the set came to life and starting making some familiar sounds from its two speakers. Once full line voltage was achieved, the set was drawing about 1.5 amps which was exactly where it should be. This was a good sign. However, since the chassis had major corrosion around the perimeter of the bottom edge, and an overall dirty and corroded appearance, I set out to make it as beautiful as I know how, so it would compliment the cabinet, not detract from it.
The first order of business was to remove a “Twistlok” can capacitor and repair a hole that had been drastically torn out to accommodate the incorrect component. There was supposed to be a large “nut-mount” type there but it could not be installed until the repair was completed. This area is located in the front left portion of the chassis. I straightened out the torn metal and filed it down to clean metal around the hole. I then placed a piece of good old “duct tape” under the chassis to act as a form or dam, mixed up a batch of “JB Weld” and filled the hole. Once the material started to set, but before it was fully cured, I knocked it down with a file and finished sanding it once it became fully cured. I then used a “Vari-bit” to make the proper diameter hole as the original, and used a cut-off wheel in a Dremel to clean out and reproduce the slots on each side of the hole. This repair, once the chassis was painted, is undetectable when viewed from the topside. I even surprised myself on this repair!
As I stated, the chassis was going to have to be repainted if it were to look like it should reside in such a great cabinet. I cleaned the set up by first removing the IF cans and any component that would aid in the painting process. I went so far as to use “liquid mask” on all the bright rivet heads that held all the tube sockets in place and any other type fastening rivet so when the painting was finished, it wouldn’t look like someone haphazardly painted it without regard to what it looked like when it was new. I painted the chassis using a copper “HAMMERITE” spray paint in an aerosol can. Although it’s not an exact match to Zenith’s original color, it is very close and is the best I have found. Maybe someone out there has a better match, but in the last eight years of restoring sets, I haven’t found one.
I reassembled the chassis and cleaned everything that went back on it. I searched for a long time until I came up with the correct appearing capacitor cans that had been discarded somewhere along this sets life. I even had to scavenge a few parts from my personal stock of Zenith parts to replace the eye-tube socket and related harness. Someone had broken open the side of the socket and installed a higher wattage 1 meg resistor on the outside of the socket instead of the painstakingly replacement of the factory location one. It’s a real pain to do it, but I gave up one of my own to do it, and the results are very satisfying.
I also had to look a while for the proper ST type glass tubes that had been replaced with metal types and GT types. Once again, I found the proper ones in my personal stash. I even had to find a correct tube shield. For some reason, some of them are more copper toned than others. I was able to locate one that matched the rest of the ones in the set and now I quite frankly don’t remember which one it was. They all look alike, now. Once all the chassis repairs were finished, I turned my attention toward the speakers. The large woofer was in need of repair. I would have sent this out for a recone, but I didn’t want a third party involved, especially with a rare component like this one. The repair I made got rid of the rattle that was associated with the torn cone and is really undetectable unless you remove the speaker from the cabinet.
Once all this extensive restoration of the chassis was completed, I aligned the set to factory specs and installed a NIB 6U5 tuning eye tube. The set performs great on all bands and reminds me of an EH Scott set, as far as its awesome output.
One of the very unfortunate occurrences during this part of the project was my computer crashed, and along with it, my files of pictures I had taken along the way. Fortunately I had emailed them to Dr. Clark so he could keep abreast of the progress and he got to see first hand the detail that went into the set. Unfortunately, though, I have lost them forever and cannot share them.
Once all the chassis work was completed, I set my sights on the cabinet. I stripped
what was remaining of the original finish in the summer of 2003. However, I didn’t get
started on the restoration of the cabinet until later in the year when I had finished the
construction of a new paint room in my facility. I needed one so I could safely perform
this type of refinishing during wet or cold weather. Here in Indiana, there is an
abundance of inclement weather and I was tired of waiting for the proper weather to
perform some of the tasks involved in achieving nice lacquer finishes. So I have built
a very nice, professionally ventilated, paint room that allows me to strip finishes or
spray on new finishes, regardless of what’s going on outside. I am now in “restoration heaven”!
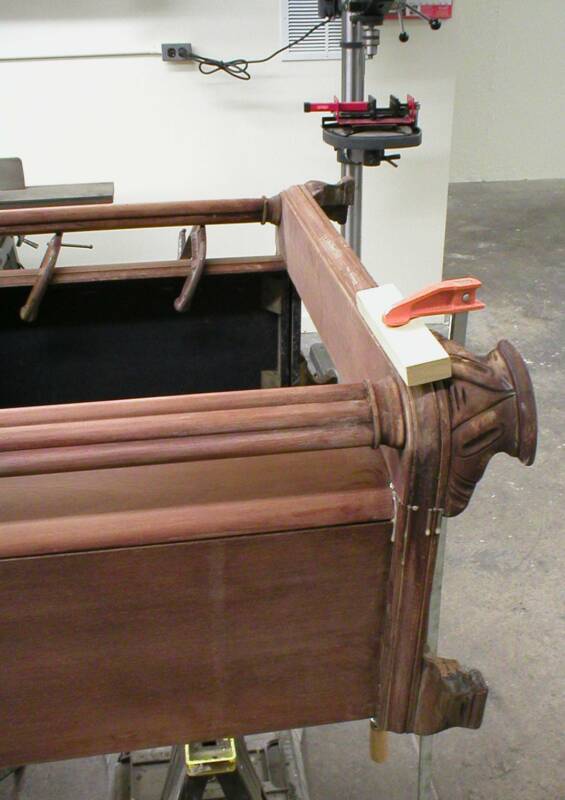
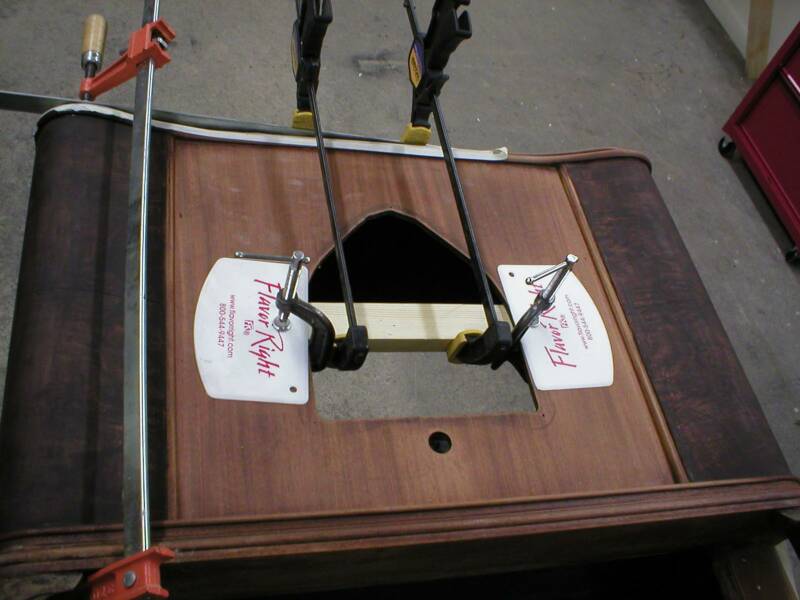
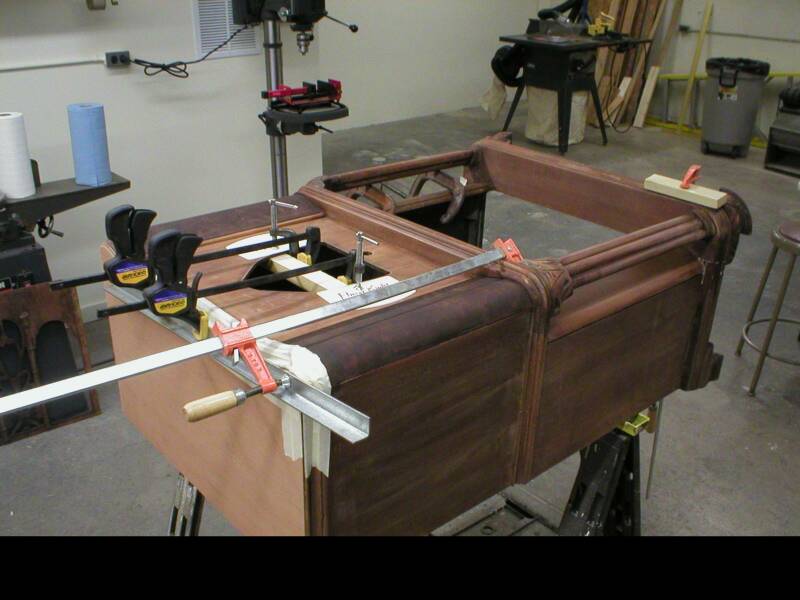
The console would be the first one to be done in this new environment. I did the necessary gluing and clamping of joints. The original veneer on the lower sides of the cabinet was so loose that I was able to completely remove it and then reattach it to the cabinet. I also had to address the common problem to these sets; cracked and split burl veneer flanking each side of the dial panel in the upper front. Although rather expensive, I was able to acquire some book-matched burled veneer so I was able to remove the damaged original and install new. This procedure was somewhat time-consuming but the results were well worth it. I finished up by the
overall sanding of the cabinet, applying a slight amount of stain, and then lacquering
the set until it “shined like a new dime”.
Once enough lacquer had been applied, I let the cabinet sit for about a month so it
could dry adequately. I then sanded the set with 600 grit, then 1200 grit, wet or dry
sandpaper. I use WD-40 for a lubricant, as water would severely damage the veneer
and this process would have to start all over again. I then polished the set with a “Fine
Cut Cleaner” and followed it up with “Show Car Glaze”. Both of these products are
made by Meguire’s for the automotive finish industry. I found it to be very suitable for
my lacquer finishes. I guess the end result of using this method that I like is,
the fact that the finish is really eye-catching and fresh but, it doesn’t look like it was
just sprayed on yesterday. It takes on an appearance of a fairly level surface with just
the slightest amount of aging to it. I like to have a glossy finish, I just don’t like it to be
too glossy.
The large set then got reassembled using several of the original components as well
as some new ones. I like to use new gum rubber chassis cushions and there are
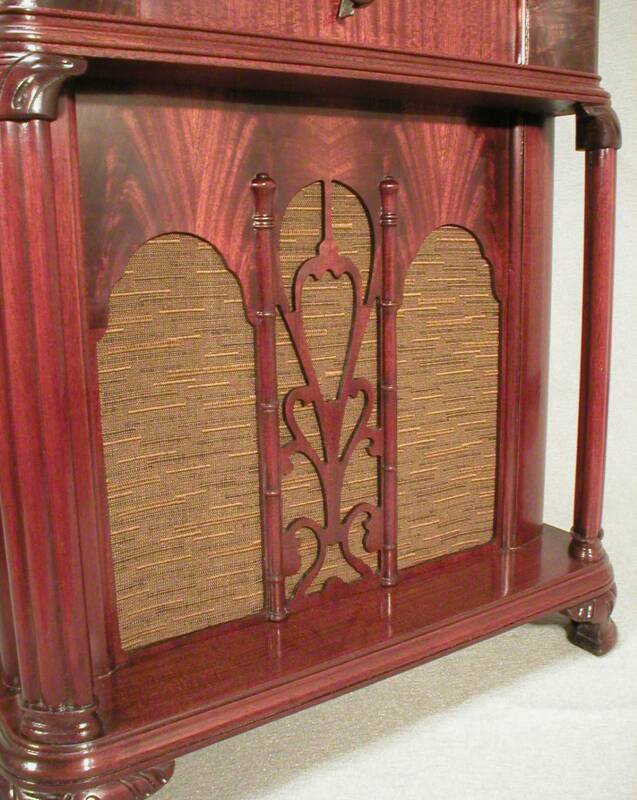
several suppliers of these today. I also had to locate new grille cloth as the original
was torn and just too rotten to try to salvage. Radio Grille Cloth Headquarters has a
very nice replacement pattern for this set and looks great once installed. It’s not
exact, but it’s darn close. The finished radio looks very nice and sounds even better. I really like the original “flame mahogany” veneer used on the speaker grille panel.
This whole set really exudes the opulence only a few people
could afford during the depression years of our great nation.
I hope that my efforts in returning this example back to a state
of appearance and function of that era will be appreciated in
the years that follow. I am confident Dr. Clark will see to it
that it will.